Cs-Cart Addon
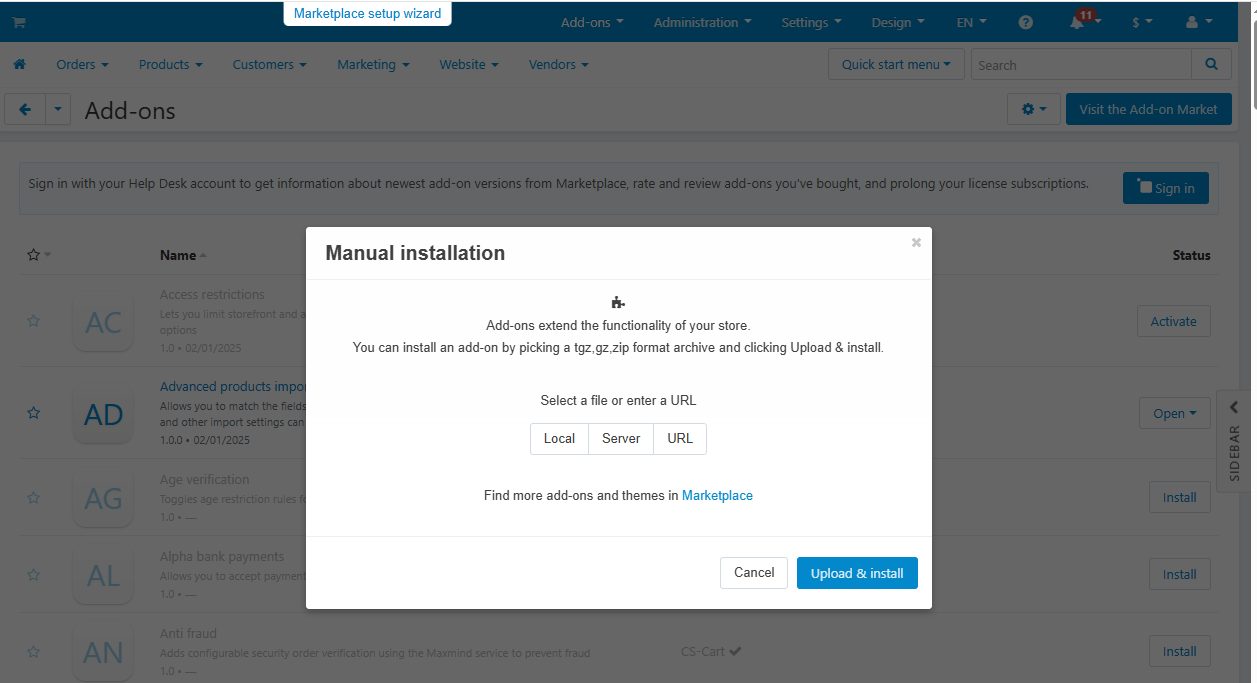
CS-Cart Addon - Manual Installation
To manually install a CS-Cart addon, follow these steps:
Step 1: Access the Addons Management Page
- Log in to your CS-Cart Admin Panel.
- Navigate to Add-ons > Manage add-ons from the top menu.
Step 2: Upload the Addon Package
- Click on the + (Upload & Install Add-on) button.
- Select "Manual installation".
- Click "Upload" and choose the .zip file of the addon from your computer.
- Click "Upload & Install" to begin the installation.
Step 3: Verify the Installation
- Once installed, the addon will appear in the Add-ons List.
- Ensure that the status of the addon is Active.
- If the addon is Disabled, click the toggle button to activate it.
Step 4: Configure the Addon Settings
- Click on the addon name to access its settings.
- Adjust the necessary configurations based on your requirements.
- Click Save to apply the settings.
Step 5: Clear Cache
- Navigate to Administration > Storage > Clear Cache.
- Click Clear Cache to ensure that the changes are applied correctly.
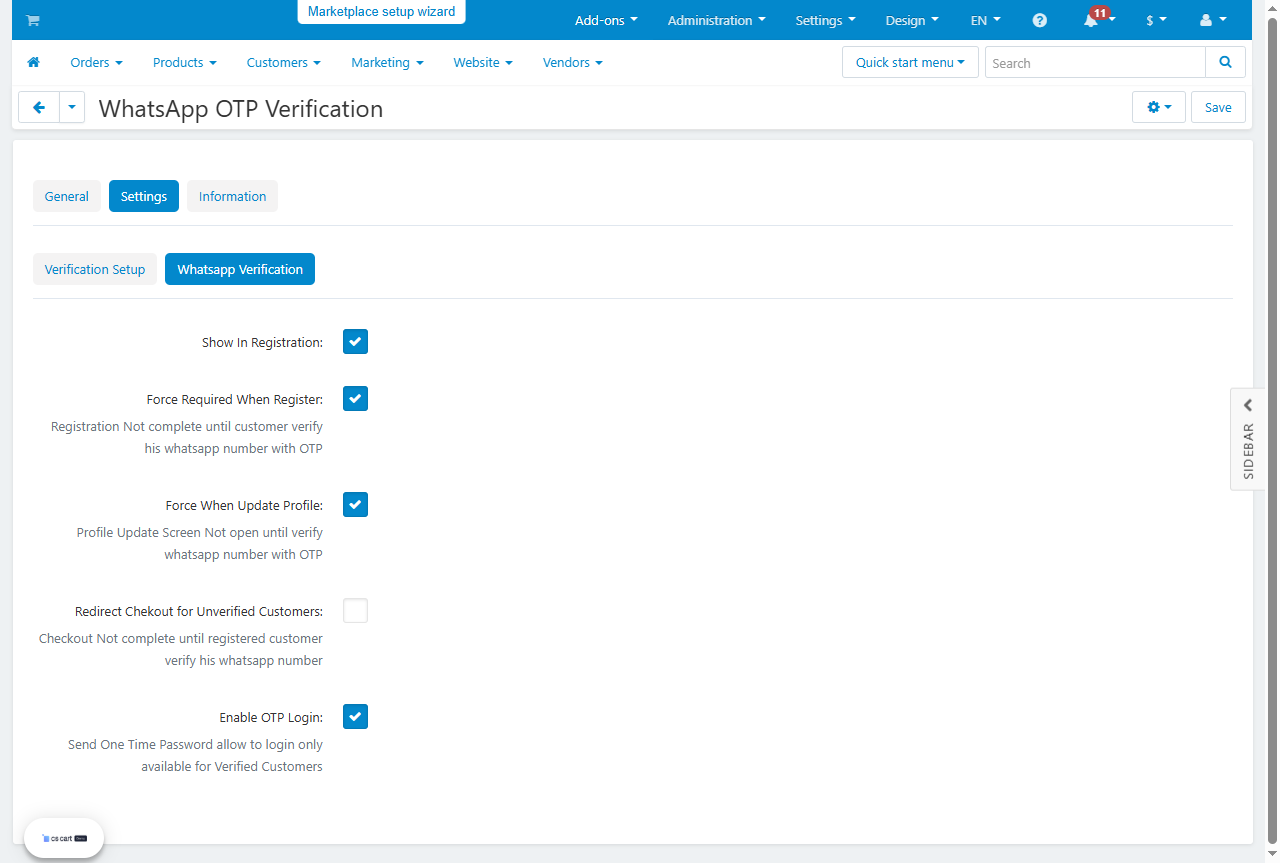
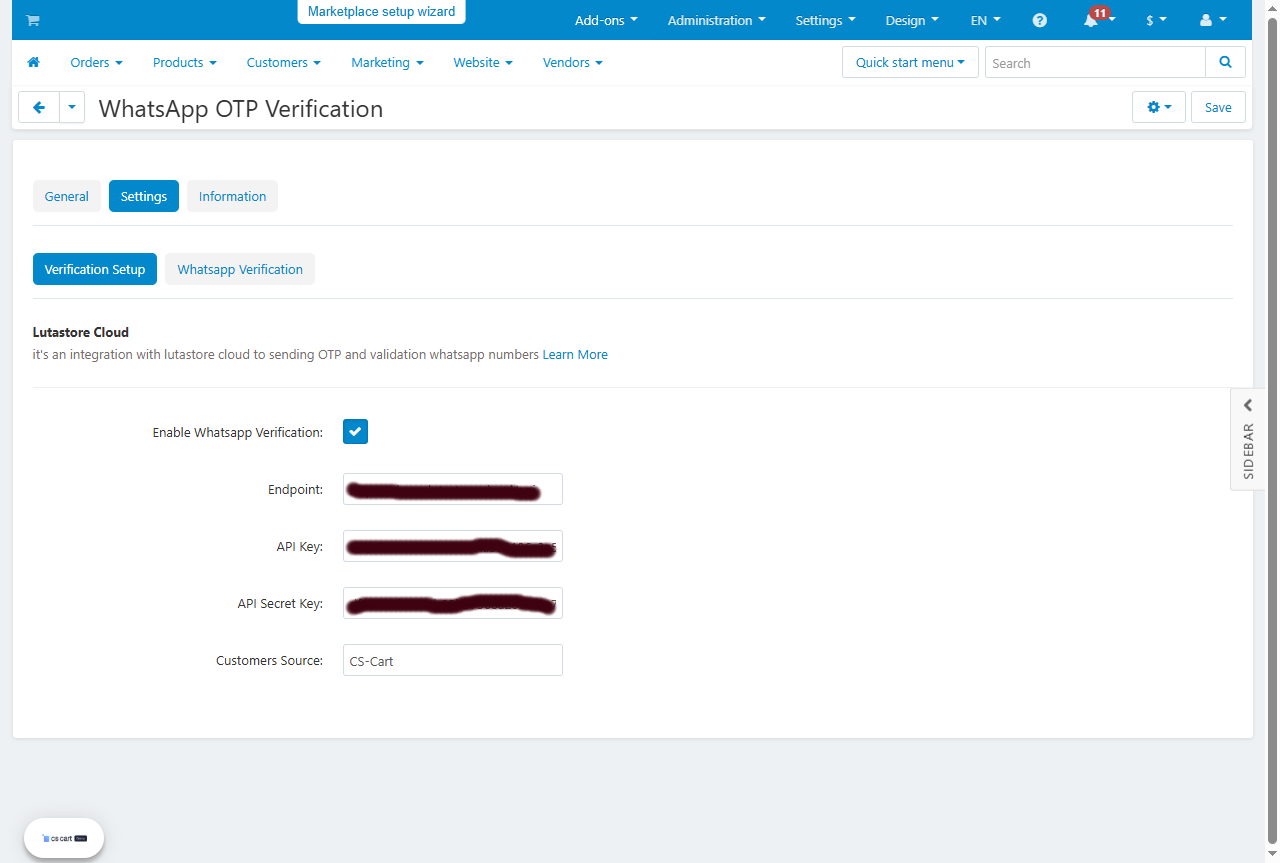
WhatsApp OTP Verification - Addon Settings
The WhatsApp OTP Verification addon in CS-Cart has three main tabs for configuration:
1. General Tab (Shown in the screenshot)
- Provides a brief description of the addon.
- Explains its purpose: allowing customers to log in and register using their WhatsApp number.
2. Settings Tab - Verification Setup
This section contains the configuration for WhatsApp OTP verification integration using Lutastore Cloud.
1. Verification Setup
Configure the connection settings for Lutastore Cloud to send and verify OTPs via WhatsApp.
- Enable WhatsApp Verification: Activate WhatsApp verification.
- Endpoint: API endpoint URL for the service.
- API Key: Unique key for using the service.
- API Secret Key: Secret key for security purposes.
2. WhatsApp Verification
Settings to enforce WhatsApp verification during login, registration, and profile updates.
- Show In Registration: Display the WhatsApp verification field during registration.
- Force Required When Register: Prevent registration completion until the WhatsApp number is verified.
- Force When Update Profile: Restrict profile updates until the WhatsApp number is verified.
- Redirect Checkout for Unverified Customers: Prevent checkout completion until the WhatsApp number is verified.
- Enable OTP Login: Allow login only for verified customers.
3. Information Tab
- Name: WhatsApp OTP Verification
- Developer: SonoTrix
- Compatibility: Unknown
- Languages: English, Arabic
- Add-on ID: srx_whatsapp_otp_verification
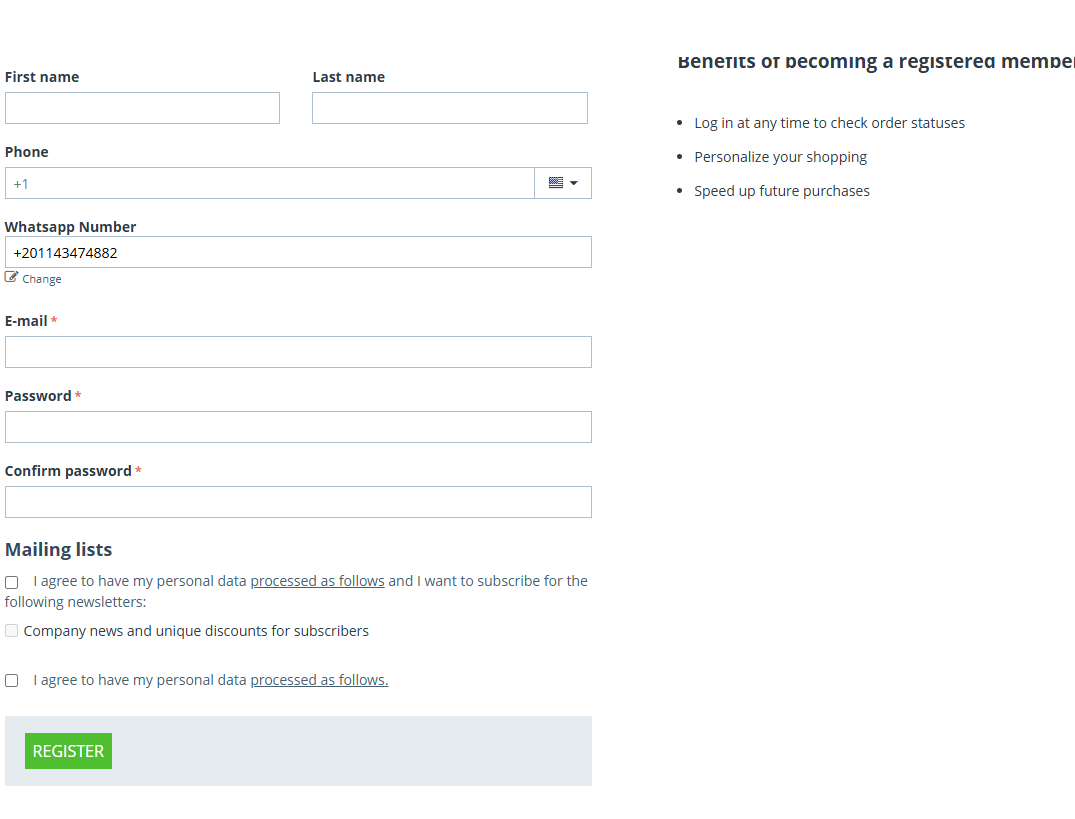
Registration Process – WhatsApp OTP Verification Addon
The registration process using the WhatsApp OTP Verification addon is designed to ensure that the user’s mobile number is valid before creating a new account.
Here’s a step-by-step explanation of how it works:
Step 1: Enter Mobile Number
When the user opens the registration page, the first screen they see is a field asking for their mobile number.
- The user enters their WhatsApp number.
- Then, they click on the “Send OTP” button.

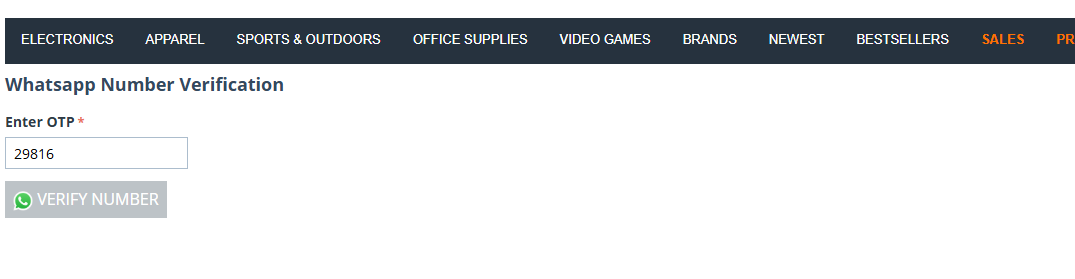
Step 2: Enter OTP
- An OTP (One-Time Password) is sent immediately to the user’s WhatsApp via the configured API service.
- The screen now asks the user to enter the OTP code they received.
- Once entered, the user clicks on “Verify Number OTP”.
Step 3: Verification Message
- If the OTP is correct, a success message is shown: "OTP verified successfully"
- At this point, the mobile number is considered verified.
Step 4: Complete Registration
- After verification, the user is redirected to the next step where they can fill in their full registration details (like name, email, password, etc.).
- Once all required fields are filled in, the user submits the form to create their new account.
Login Process – WhatsApp OTP Verification
The WhatsApp Login feature allows users to sign in without entering a password, by verifying their mobile number via an OTP (One-Time Password) sent through WhatsApp.
Here’s a step-by-step breakdown of the process:
Step 1: Open the Login Popup
- When users click “Sign in” from the storefront, a login popup appears.
- In addition to the standard email and password fields, there is a button labeled “WhatsApp Login”.
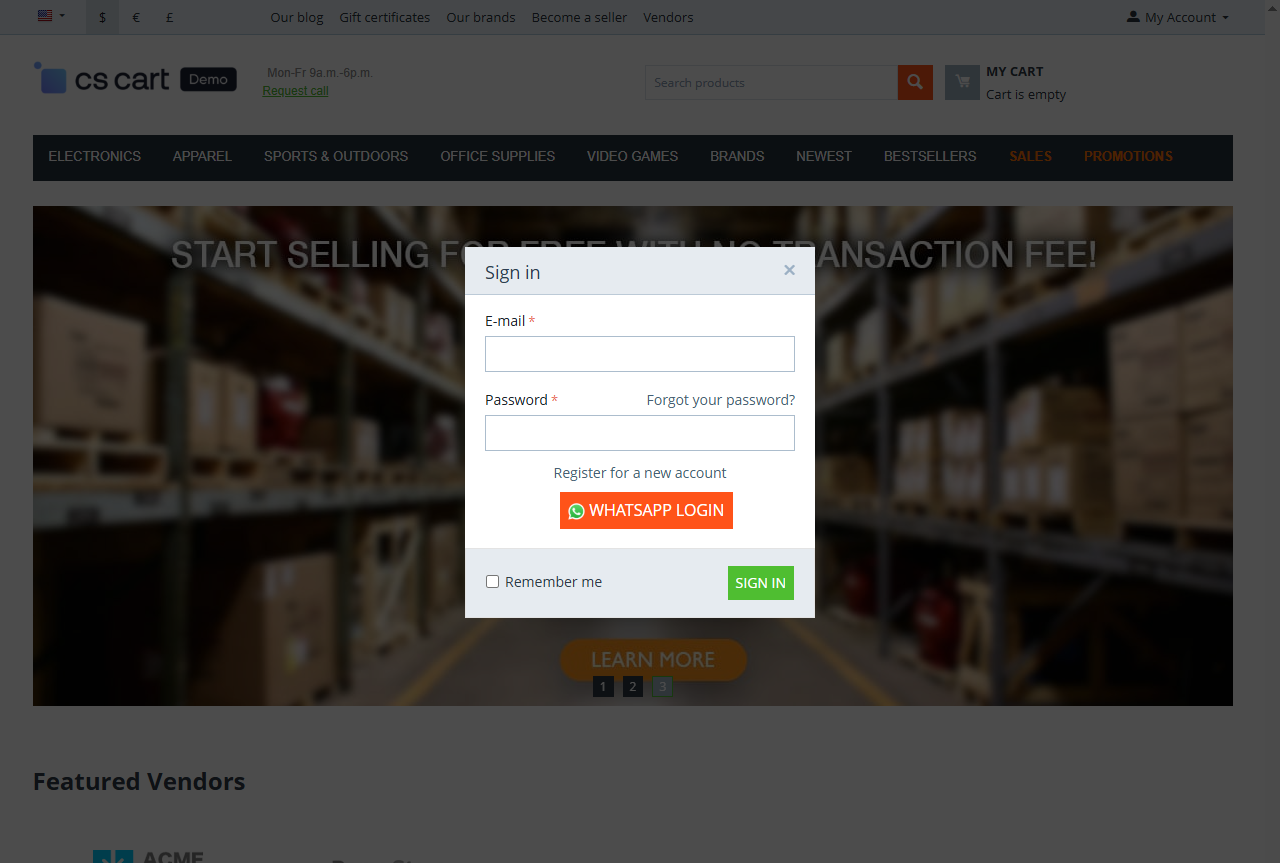
Step 2: Click "WhatsApp Login"
- The user clicks on the WhatsApp Login button.
- A new screen opens asking the user to enter their WhatsApp number.
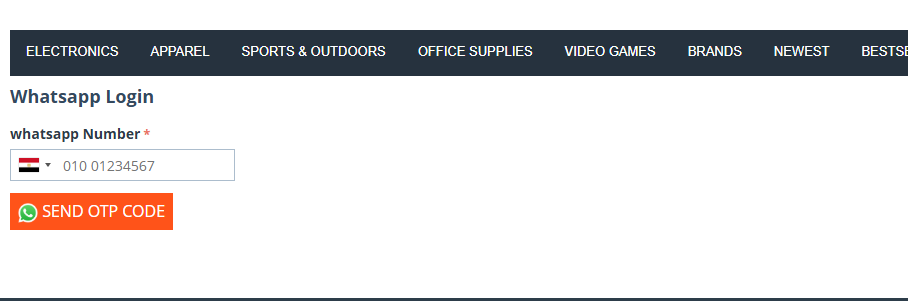
Step 3: Send and Enter OTP
- After entering the number, the user clicks “Send OTP”.
- An OTP is sent to the entered number via WhatsApp.
- The user is then prompted to enter the OTP received.
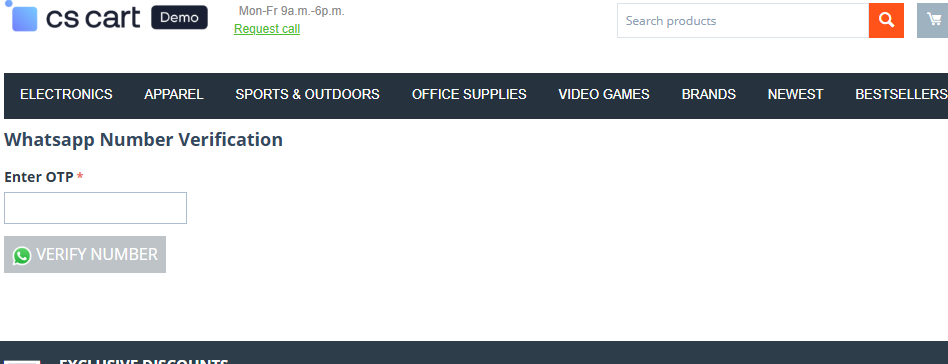
Step 4: Verify OTP
- The user clicks “Verify OTP” after entering the code.
- If the OTP is correct, a confirmation message appears: "OTP verified successfully"
Step 5: Logged In
The user is now successfully logged in and redirected to their account or the previous page they were on.