OpenCart Plugin
This guide provides step-by-step instructions for installing and configuring plugins in OpenCart. Whether you're setting up a security plugin, payment gateway, or custom module, this guide ensures a smooth installation process.
Why Use Plugins in OpenCart?
Plugins extend the functionality of your OpenCart store by adding features such as:
- Enhanced security (e.g., two-factor authentication)
- Improved user experience (e.g., WhatsApp OTP verification)
- Integration with third-party services (e.g., payment gateways, shipping providers)
- Custom workflows tailored to your business needs
Key Features of Plugins
-
Ease of Integration:
- Direct integration without modifying core files.
- No additional SDKs or apps required for most plugins.
-
Customizable Settings:
- Flexible configuration options to suit your store's requirements.
- Optional features that can be enabled or disabled.
-
Enhanced Security:
- Prevent unauthorized access with advanced verification methods.
- Real-time validation for inputs like phone numbers or emails.
-
User-Friendly Experience:
- Simplified workflows for customers and administrators.
- Mobile-friendly interfaces for modern e-commerce stores.
Plugin Installation & Setup
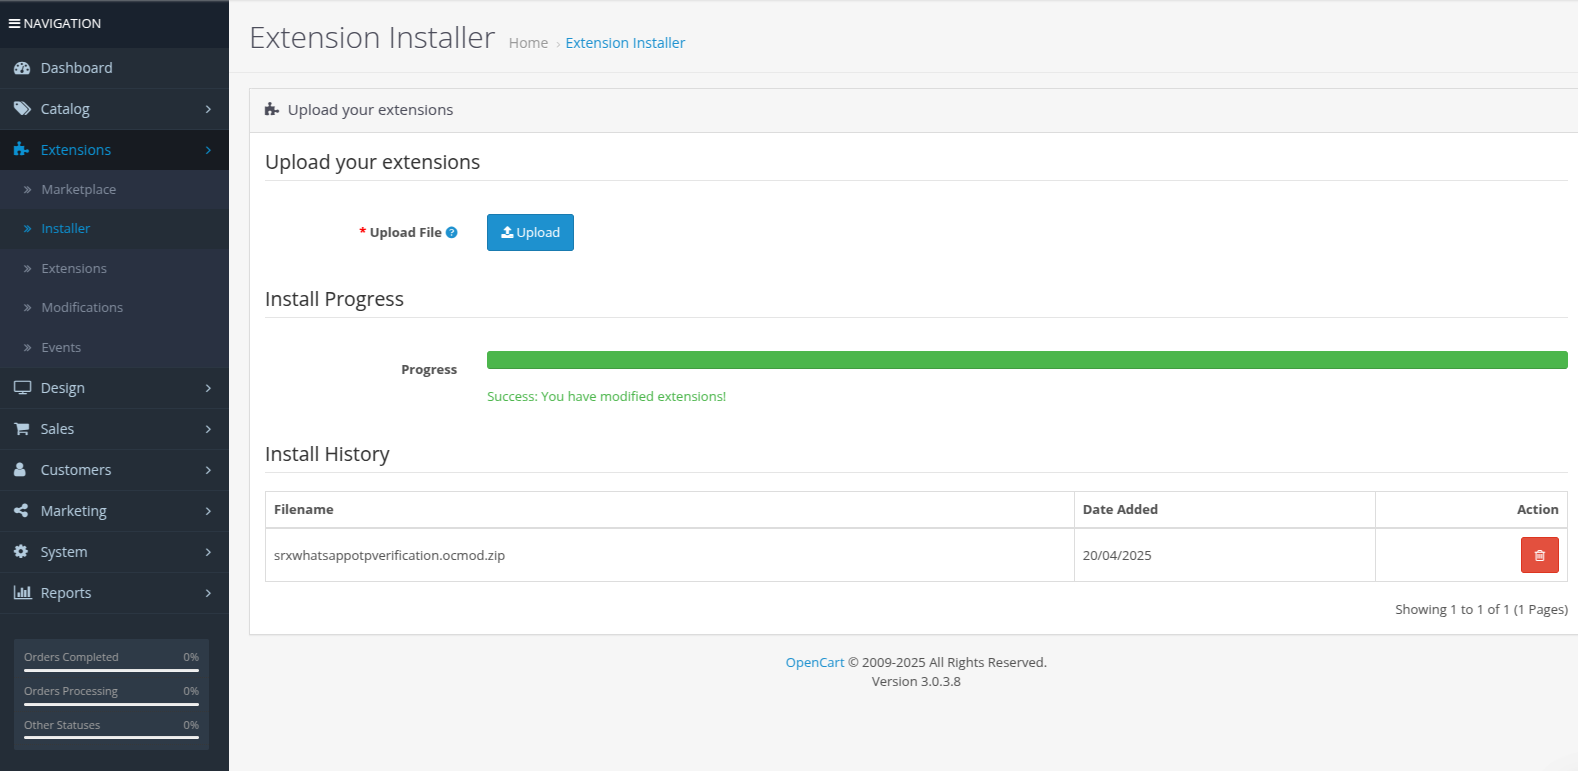
Step 1: Access the Extensions Page
- Log in to your OpenCart Admin Panel.
- Navigate to Extensions > Installer from the left menu.
Step 2: Upload the Plugin Package
- Click on the Upload button.
- Select the
.zipor.ocmod.zipfile of the plugin from your computer. - The system will automatically install the plugin.
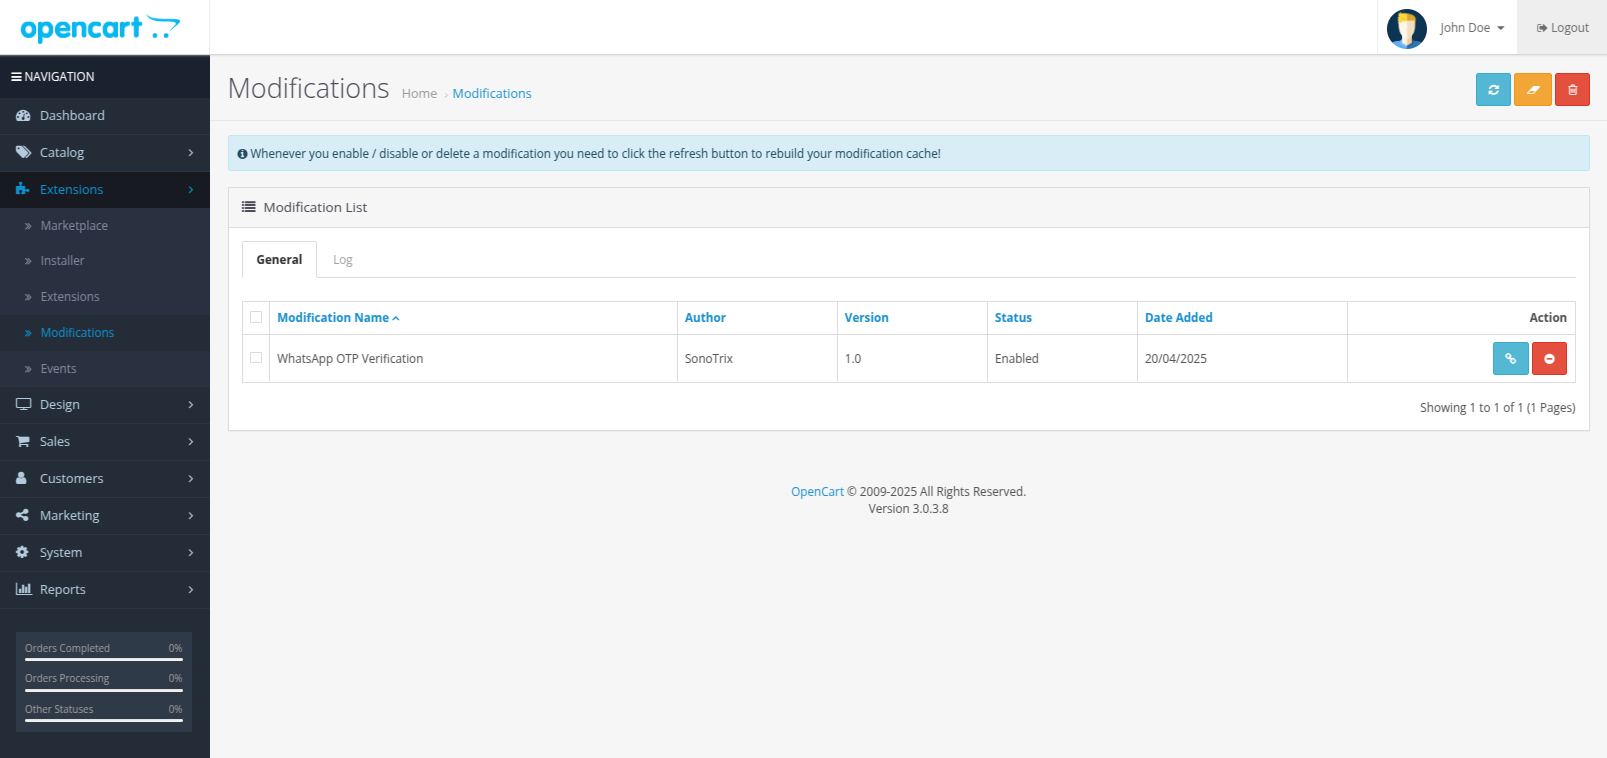
Step 3: Refresh Modifications
- Go to Extensions > Modifications.
- Click the Refresh button to ensure the plugin's modifications are applied to your store.
- This step is crucial for plugins that modify core files or add new functionality.
Step 4: Enable the Plugin
- Go to Extensions > Extensions.
- Select the extension type (Modules, Payments, etc.) based on the plugin category.
- Find your installed plugin in the list.
- Click the blue "Install" button to enable it.
Step 5: Configure the Plugin Settings
- After installation, click the blue "Edit" button next to your plugin.
- Adjust the necessary configurations (e.g., API keys, activation settings).
- Click Save to apply the settings.
Step 6: Clear Cache
- Navigate to Dashboard > Developer Settings.
- Click Clear Cache to ensure changes take effect.
Plugin Configuration Example: WhatsApp OTP Verification
The WhatsApp OTP Verification plugin is an example of a plugin that enhances user authentication. Below are its configuration details:
1. General Settings
- Provides a brief description of the plugin.
- Allows customers to log in and register using their WhatsApp number.
2. Verification Setup
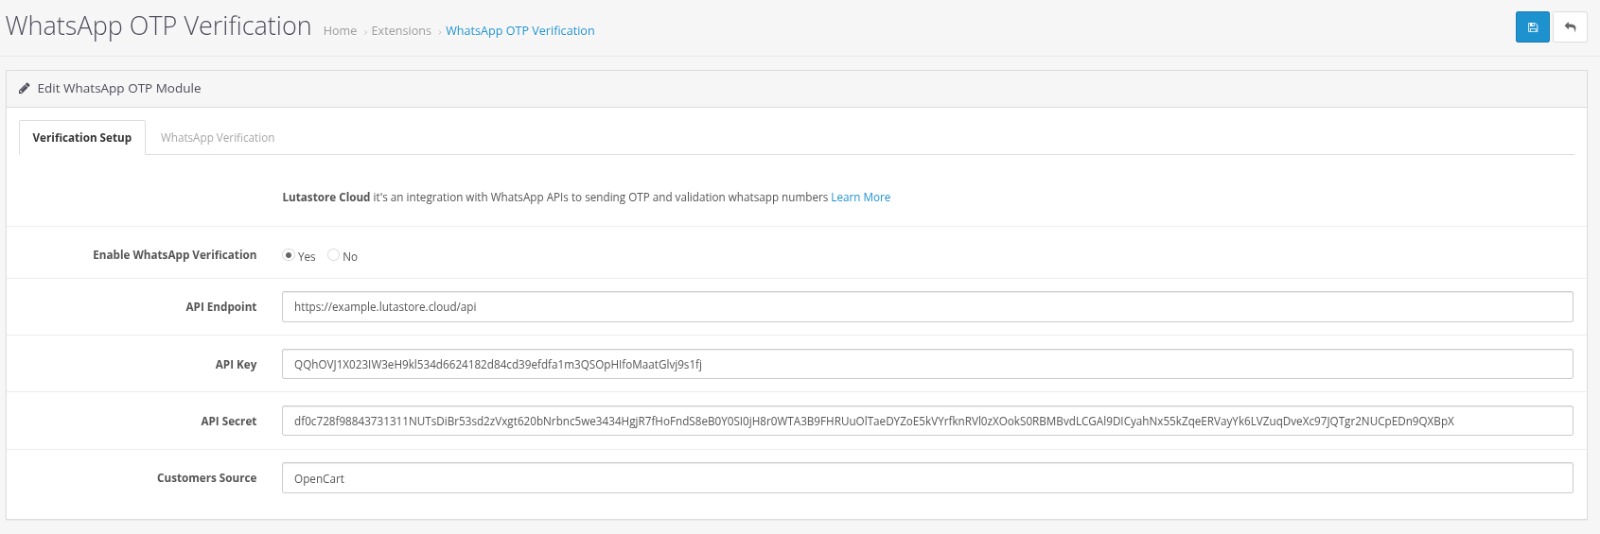
API Configuration
- Enable WhatsApp Verification: Activate WhatsApp verification.
- Endpoint: API endpoint URL for the service.
- API Key: Unique key for using the service.
- API Secret Key: Secret key for security purposes.
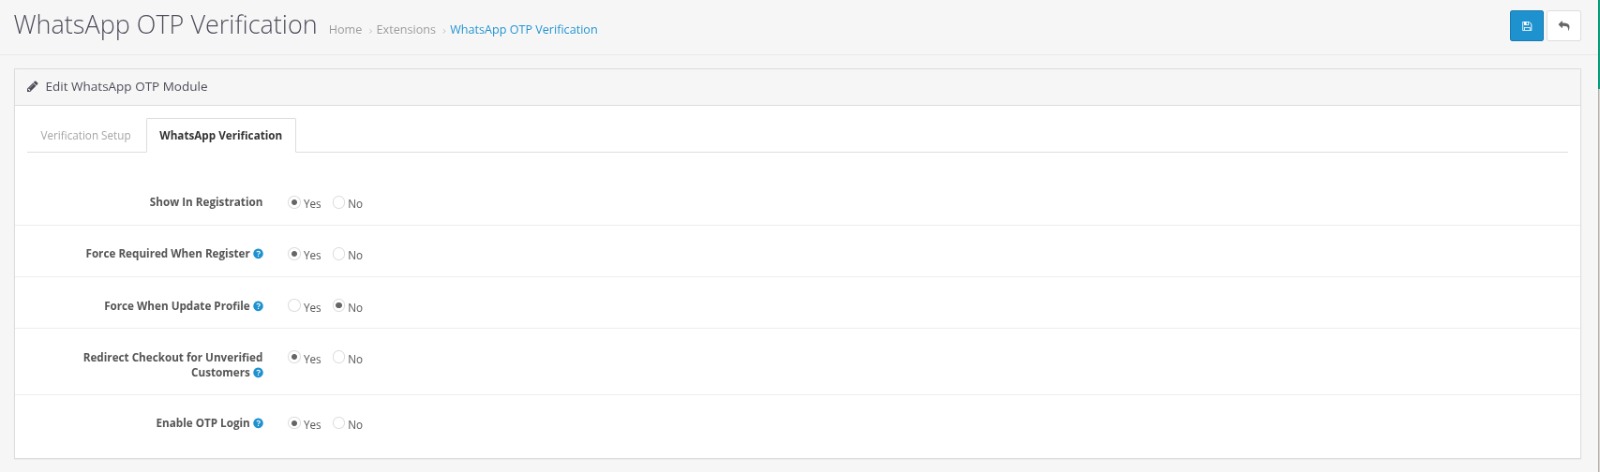
Verification Rules
- Show In Registration: Display WhatsApp verification during registration.
- Force Verification on Registration: Require verification before registration.
- Force Verification on Profile Update: Require verification for profile changes.
- Block Checkout for Unverified Users: Prevent checkout without verification.
- Enable OTP Login: Only allow verified users to log in.
3. Plugin Information
- Name: WhatsApp OTP Verification.
- Developer: SonoTrix.
- Compatibility: OpenCart 3.x & 4.x.
- Languages: English, Arabic.
- Plugin Version: 1.0.0.
Plugin Workflows: Example - WhatsApp OTP Verification
1. Registration with WhatsApp OTP
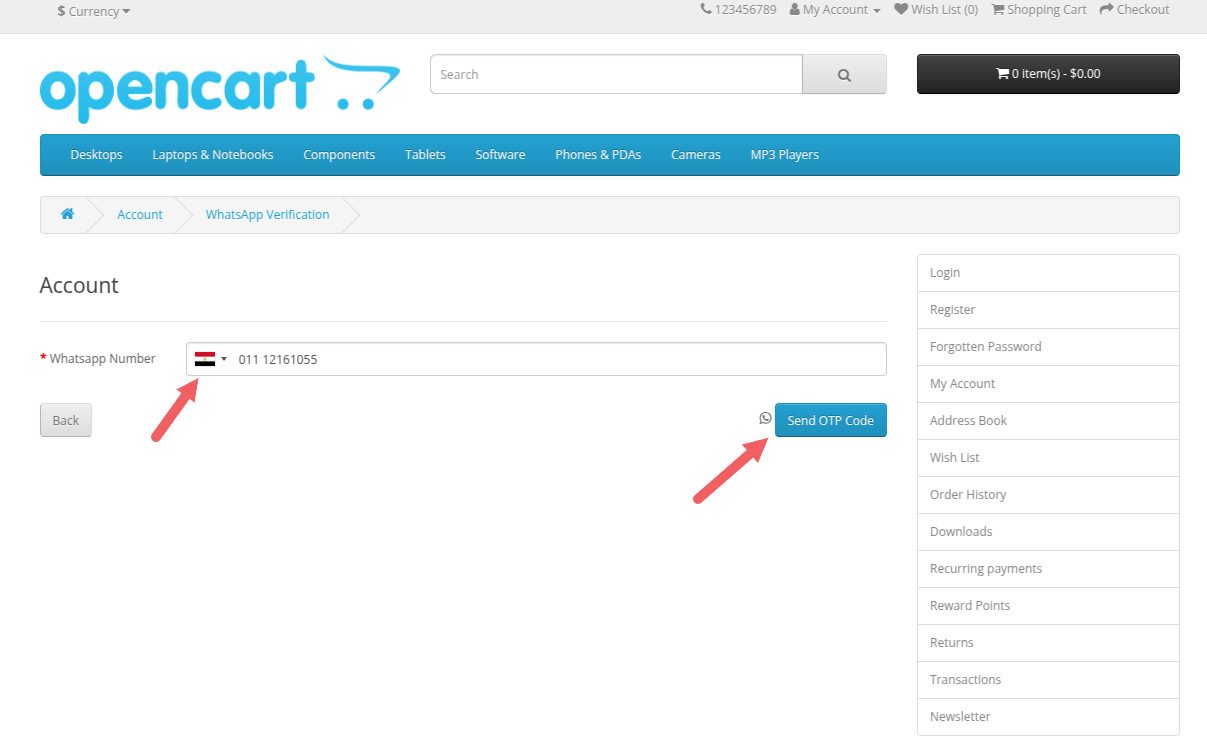
Step 1: OTP Request
- User enters their WhatsApp number on a dedicated page.
- System sends a 6-digit OTP code via WhatsApp.
- Visual confirmation appears: "OTP sent to +201112161055".
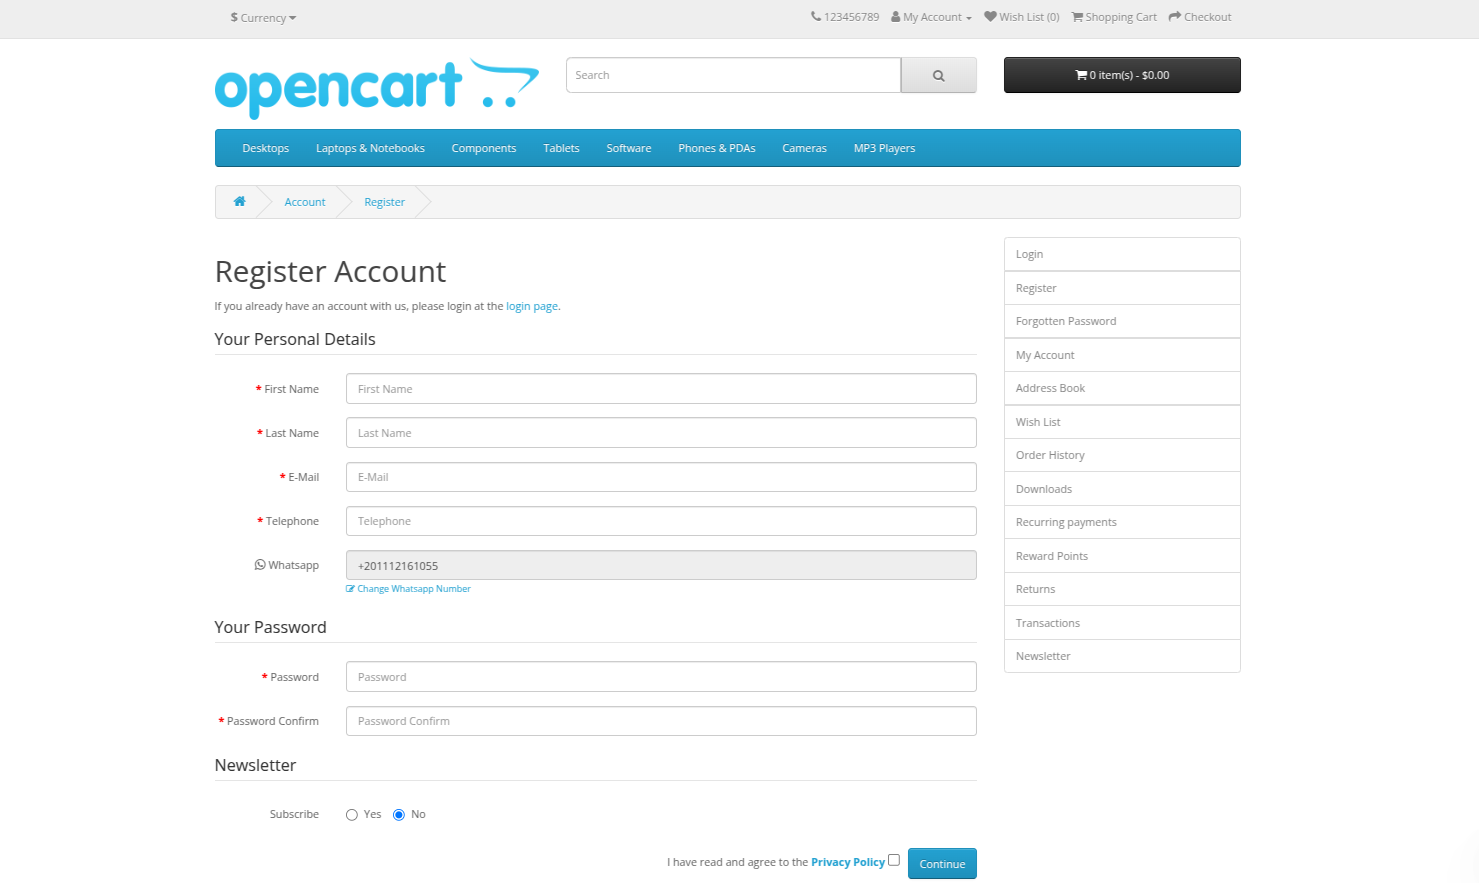
Step 2: Account Registration
- After entering the OTP, the registration form appears.
- Fields include:
- Name, Email, Password, etc.
- Verified WhatsApp number (pre-filled).
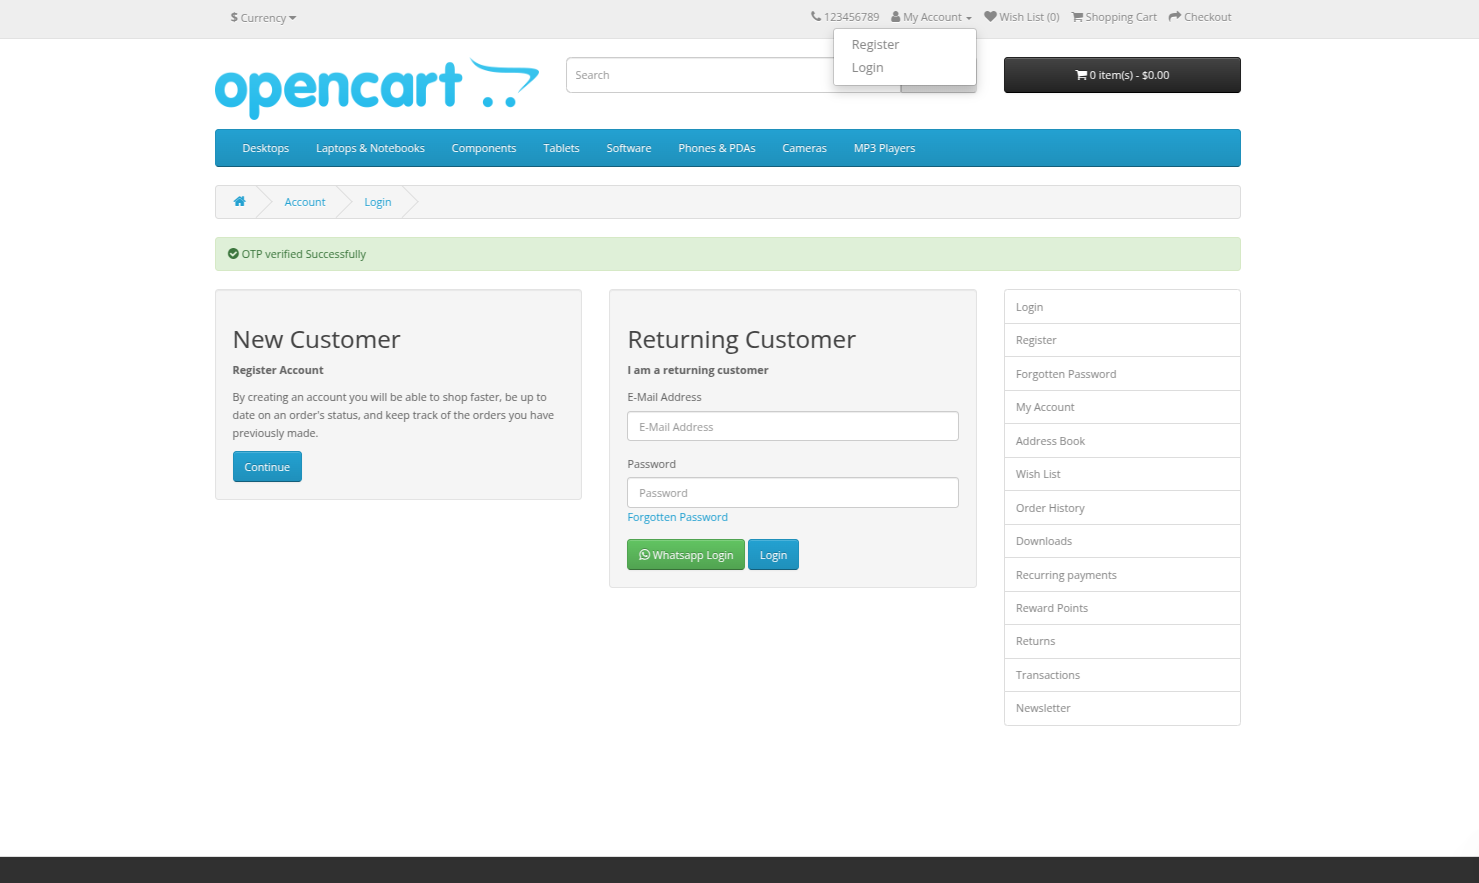
Step 3: OTP Verification
- User confirms the OTP code.
- "Verify WhatsApp" button completes verification.
- Account created upon successful match.

2. WhatsApp OTP Login
Option 1: Traditional + WhatsApp Login
- Standard email/password fields.
- WhatsApp Login checkbox option.
- Dual authentication support.
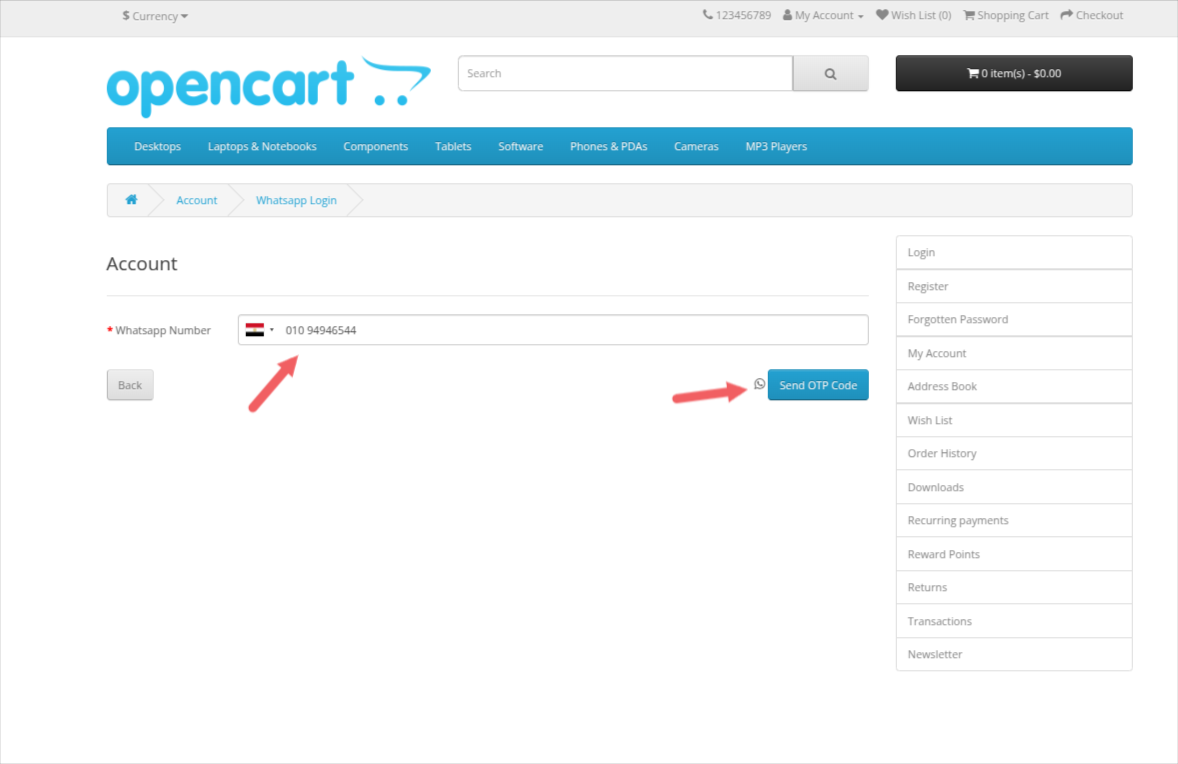
Option 2: Pure WhatsApp Login
- Recognizes verified numbers.
- Single-click OTP generation.
- No password required.
Successful Verification
- Clear verification status.
- Full account access granted.
- Session management controls.

Conclusion
By following this guide, you can successfully install and configure any plugin in OpenCart. Whether you're setting up the WhatsApp OTP Verification plugin or another module, the steps remain consistent. Always ensure to test the plugin thoroughly after installation to confirm it works as expected.